Thunderbolt is the hardware interface to connect any Thunderbolt device to your PC. These accessories are known for their high speed that beats any regular external devices. But sometimes, the “cannot use Thunderbolt accessory” notification may bother you.
I figured out how to fix this with some easy approaches. Here are some of the things that might help:
- Use The Right Thunderbolt Cable
- Use The Correct Port
- Update The Thunderbolt Firmware
- Check If The Thunderbolt Port Is Healthy
- Make Sure Your Thunderbolt Accessory Is Supported
- Enable The Thunderbolt Devices
It’s a bummer that you cannot use the Thunderbolt accessories. Let’s check all the solutions in brief.
What Is A Thunderbolt?
Thunderbolt is a high-speed hardware interface technology that was developed by Intel in collaboration with Apple. It was first introduced in 2011 and has since become a standard feature on many Mac computers, including MacBooks and iMacs.
Thunderbolt is designed to provide fast data transfer rates between devices, with a theoretical maximum speed of up to 40 Gbps. It uses a compact connector that combines both data and power transfer, allowing for multiple devices to be daisy-chained together. Thunderbolt also supports multiple protocols, including PCIe, USB, and DisplayPort.
One of the main benefits of Thunderbolt is its ability to provide high-speed data transfer for external devices such as storage drives, displays, and audio interfaces. It also allows for video output to external displays with resolutions up to 5K.
In addition, Thunderbolt provides power to connected devices, eliminating the need for separate power supplies for some peripherals. This makes it a popular interface for professional users who require fast data transfer speeds and the ability to connect multiple devices to their computer.
What Is The Use Of A Thunderbolt Port?
You can use the Thunderbolt port to connect external devices and accessories to your Mac or Windows PC. I had an M2 Macbook Air where I connected an extra display using the Thunderbolt 3 port.
However, not only an external monitor, but you can also connect a TV or devices like external storage devices. Besides, you can also use the port to connect mini DisplayPort, HDMI, or VGA devices.
Unable To Use Thunderbolt Accessory? Here Are Some Solutions
Thunderbolt accessories are awesome new additions to the fast-paced technology. So, when I wanted to try some of the accessories in my MacBook air, it seemed unwilling to help me. Let’s cut the crap; how can you solve it when your Mac or Windows denies supporting your Thunderbolt accessory? Here are some key solutions
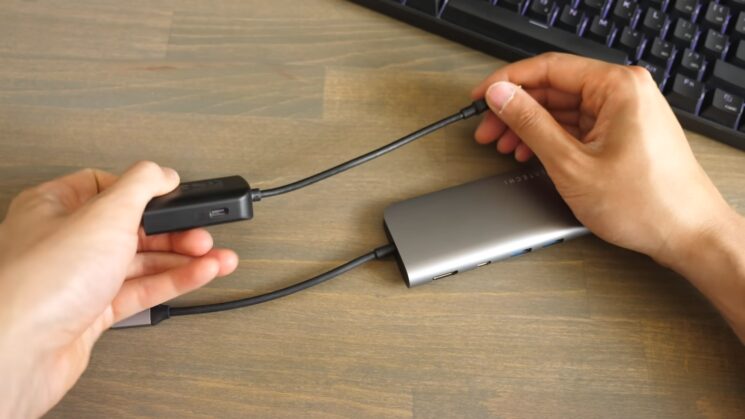
Solution 1: Use The Right Cable, Please!

Of course, you cannot just put a USB cable in the place of a Thunderbolt port; it won’t fit. So you must ensure that you use a Thunderbolt 3 cable in the right Thunderbolt 3 port.
When the cable that you are using for your Thunderbolt docks is not a Thunderbolt 3 cable, it won’t be able to work. Therefore, although USB-C and Thunderbolt 3 are almost identical, you must ensure that you use a Thunderbolt cable.
Here Are Some Key Points To Identify A Thunderbolt Cable:
- Thunderbolt cables have a graphic lightning bolt logo on the top of the cable or both ends.
- You may also notice a “3” on top of the cable
- The shapes of a USB-C and Thunderbolt cable are slightly different
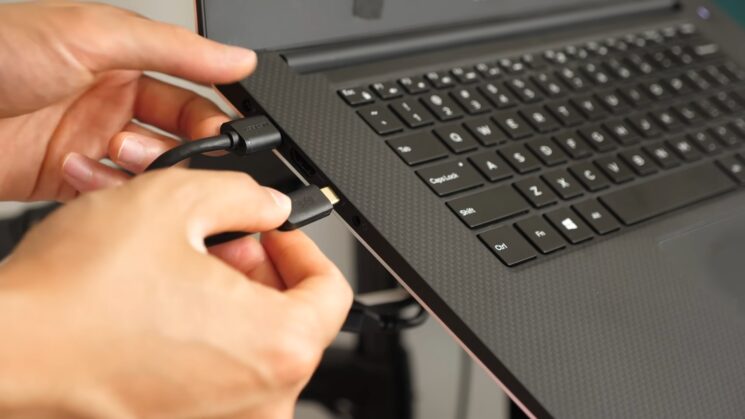
Solution 2: Use The Correct Port
Like the cables, the USB C port and Thunderbolt port almost look the same. So if you have mistakenly used the wrong port, that might be why your accessory isn’t working. To avoid this, you have to use the right port.
Thunderbolt ports usually have a lightning bolt picture on top of the port in Windows and Mac. So, figure out where it is and set the cable in the right port.
Solution 3: Update The Thunderbolt Firmware
The Thunderbolt firmware lets the OS access the Thunderbolt Controller. Sometimes, outdated firmware in your Windows or Mac might be why your device is not detecting your Thunderbolt accessory. In such cases, you must update the Thunderbolt firmware on the host device. Here’s how to do so:
For Mac:
- Go to https://support.apple.com/kb/DL1775?locale=en_US
- Download the latest update
- Turn off the device
- Now unplug the Thunderbolt display
- Then turn on the device and plug in the display
- At this point, operate the Update/Installer
- The installer may cause a restart, then restart the device, and the firmware will be updated
For Windows:
- Plug your Thunderbolt device into the PC
- Now go to your computer’s Support page
- On the Product Support page for your device, go to Drivers & Downloads
- Now from the given category, find out Intel Thunderbolt 3 Firmware
- Once you have found the firmware, click on Download
- After that, you have to find the file on your computer and then install the updates
Solution 4: 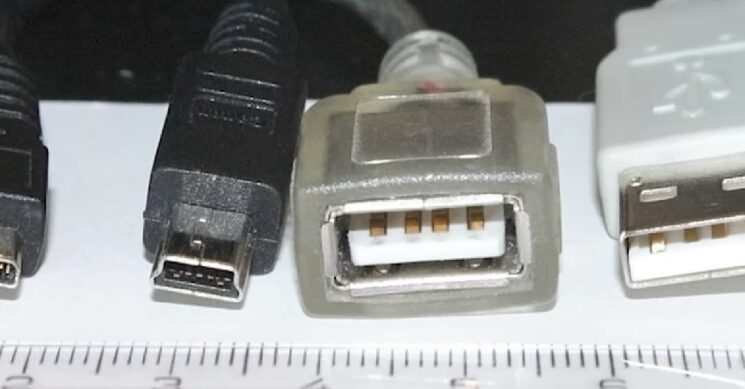
An old port may not work properly to connect your Thunderbolt device. In such cases, any disruptions in the port may cause a connection issue. First, check if any debris is interrupting the connection or not. Also, you can seek help from a professional to check if the port is all good.
Solution 5: Make Sure Your Thunderbolt Device Is Supported
A few days ago, when I connected an external device to my MacBook Pro using a Thunderbolt connection, the device failed to show up. Later, I learned that the problem was that the device wasn’t compatible with my Mac.
However, sometimes, the device you are trying to use might not be compatible with your Macbook or computer. In that case, the device will fail to work. So, ensure your device supports the accessory that you are trying to use.
Solution 6: Check If The Thunderbolt Is Disabled
The Thunderbolt devices might be disabled on your computer. In that case, you won’t be able to use the accessories. So, you have to enable Thunderbolt on your computer. Here’s how you can do it:
For Windows:
- Reboot your device
- Press F2 to enter BIOS
- Now, go to Advanced
- Scroll to the Devices option and then to Onboard Devices
- Now enable the Thunderbolt Controller
- Once you are done, press the F10 key to save and exit
For Mac:
- First, connect a Thunderbolt cable to your Thunderbolt port
- Go to the Apple Menu
- Now go to System Preferences
- After that, click on Network
- Once you reach there, select Thunderbolt Bridge from the list
- Now click on Advanced and then the DNS
- Once you reach DNS, enter your DNS and search domain addresses to enable the Thunderbolt
FAQs
How To Reset Thunderbolt 3 Ports On Macbook Pro?
If you want to reset the ports:
- Press the left-side Shift-Control-Option keys.
- Press the Power Button simultaneously.
- After 30-40 seconds, release the keys at the same time.
That will reset your Thunderbolt 3 ports.
What Is The Function Of Thunderbolt Port?
The port lets you use the Thunderbolt accessories that provide high-speed and high-resolution media usage. Also, it allows the PCI Express speed to serve you most straightforwardly.
Are USB-C And Thunderbolt The Same?
No, they might seem identical, but they are not the same. Thunderbolt ports are compatible with USB-C devices, but you will get more extensive features from the ports. They are specially meant to give a high-speed service to you.
Why Is My Mac Thunderbolt Port Not Working?
There are several possible reasons why your Mac Thunderbolt port might not be working. It could be a result of hardware failure, incorrect connections, or a software issue. If the port is not working, check the connections and make sure they are secure.
If the connections are secure, check to see if the Thunderbolt port is enabled in the System Preferences. If the port is enabled, try resetting the SMC and the NVRAM. If the port still doesn’t work, contact Apple support for further assistance.
How do I enable Thunderbolt in BIOS?
Enabling Thunderbolt in BIOS can vary depending on the manufacturer and model of your computer’s motherboard. However, here are some general steps you can follow:
- Restart your computer and enter the BIOS setup by pressing the appropriate key during the boot process. The key may vary depending on your computer’s manufacturer, but common keys are F2, F10, and Del.
- Look for an option related to Thunderbolt, such as “Thunderbolt Configuration,” “Thunderbolt Support,” or “Thunderbolt Security.”
- Enable Thunderbolt by selecting the option and changing the setting from “Disabled” to “Enabled.”
- Depending on the BIOS version and motherboard, you may also need to enable the “Thunderbolt Boot Support” option to allow the computer to boot from a Thunderbolt-connected device.
- Save the changes and exit the BIOS setup. Your computer should now recognize Thunderbolt devices when they are connected.
It’s important to note that enabling Thunderbolt in BIOS may also require additional configuration within your operating system, such as installing drivers or software updates. Check the documentation for your specific motherboard and Thunderbolt device for more information.
How do I install Thunderbolt firmware?
Installing Thunderbolt firmware can vary depending on the manufacturer and model of your computer and Thunderbolt device. However, here are some general steps you can follow:
- Check for firmware updates: Before installing Thunderbolt firmware, make sure you have the latest version available for your computer and Thunderbolt device. Check the manufacturer’s website for firmware updates and download the appropriate files.
- Connect your Thunderbolt device: Connect your Thunderbolt device to your computer using a Thunderbolt cable.
- Restart your computer: Restart your computer to ensure it recognizes the Thunderbolt device.
- Install the firmware: Double-click the downloaded firmware file to begin the installation process. Follow the on-screen instructions to complete the installation. Depending on the manufacturer, you may need to restart your computer again after the firmware is installed.
- Verify installation: After installing the firmware, verify that your Thunderbolt device is working properly by checking the device manager or system information. Make sure the firmware version matches the latest version available on the manufacturer’s website.
It’s important to note that some Thunderbolt devices may require additional steps for firmware installation or configuration. Check the manufacturer’s documentation for specific instructions on installing and updating firmware for your Thunderbolt device.
How do I check Thunderbolt capability?
To check the Thunderbolt capability of your computer, you can check the manual or other documentation that came with your device. Alternatively, you can open the Apple menu on the top left corner of your screen and select About This Mac, then select the More Info button.
There, you should see a Thunderbolt icon that indicates the Thunderbolt capability.
If you have a Mac laptop, you can use the System Information app to check your Thunderbolt ports. Additionally, if you are looking to purchase a new PC , it’s important to check if it has a Thunderbolt port .
Hope You Are Already Ahead Of This
I use the Thunderbolt port to connect my external devices, which helps me much more than the USB-C devices. However, nothing is odd-free, so if you are facing the inability to use any Thunderbolt accessory, my given suggestions will be beneficial.
Before you go for other solutions, check if you have connected the cable to the right port or if the cable is right for your Thunderbolt port. If that’s the issue, then you can save a lot of time!