The Lenovo Legion Touchpad is designed to improve your gaming experience, but it’s not just for gamers.
The device allows you to adjust the sound level of your game or change your settings without having to use the keyboard or for your everyday task such as browsing the web.
But, it is very disappointing if you face any problem with your touchpad.
If your Lenovo Legion touchpad not working, You can fix it by
- Running the Windows troubleshooter
- Uninstalling and then reinstalling the driver
- Update the driver if available.
- Enable your device in Device Manager and make sure to restart your computer for the changes to take effect.
However, the fix is often very simple and can be done by the user. In this article, I will show you how to fix this problem.
Why Is the Lenovo Legion Touchpad Not Working?

As you know, there can be many reasons for this problem, and the first step is to find the correct reason.
Here are some reasons for the touchpad not working. Don’t worry; we will tell you most of the ways to fix the problem as well.
- Did not install the touchpad driver
- Did not enable the touchpad
- Did not update driver
- The new driver is cashing the touchpad not to work
- The touch sensitivity is very low
- Used driver booster 8 to update driver
Also read: Lenovo Yoga Not Charging – Get Rid of The Problem
How To Fix the Lenovo Legion Touchpad?
Here you will find the appropriate fixes for the problems mentioned above. They will start with simple fixtures but slowly move to more complicated ones.
Regardless, one of these will surely fix the touchscreen of your Lenovo Legion laptop.
Restart the Laptop
The first and most common step is to restart the laptop. If electronic devices, just restart them. You can also hold down the power button to shut down and drain.
Install the Touchscreen
Sometimes, people forget to download and install the downloaded touchpad driver. If this step is not complete, the touchscreen will not be enabled, and you will not be able to use it.
So here are the steps to install the touchscreen driver. Make sure to download it only through Lenovo support.
Step 1
Open the internet browser and go to the Lenovo website, from which you should go to “Support”.
Step 2
You must select your device on the website by searching the computer’s model name in the search box. This will allow you to access all resources and services for your device.
Step 3
Now go to the menu’s bar, click “Drivers & Software,” and select the correct operating system from the list.
Step 4
From the “Components menu,” select “Keyboard and Mouse” to see the drivers available.
Step 5
Select the appropriate driver from the list and download it to start the process.
Step 6
Once the downloading process is done, you have to install it. The installation instructions are available once the download is complete; all you have to do is follow them.
Enable the Touchscreen Option
Many people forget to enable the touchscreen option, or it can accidentally get disabled. So there are two ways to enable it.
1. Go to the search box on the laptop and type “mouse” from here; you will either find “Mouse,” “Mouse Properties, or “Mouse & Touchpad settings.”
2. Now go to “Additional Mouse Options” from here, and you will find the “Device Settings.” You will find the touchpad’s brand name, which can be enabled by clicking “On.”
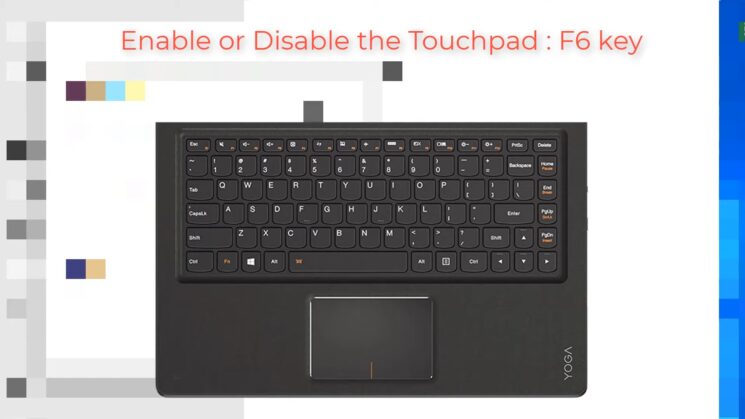
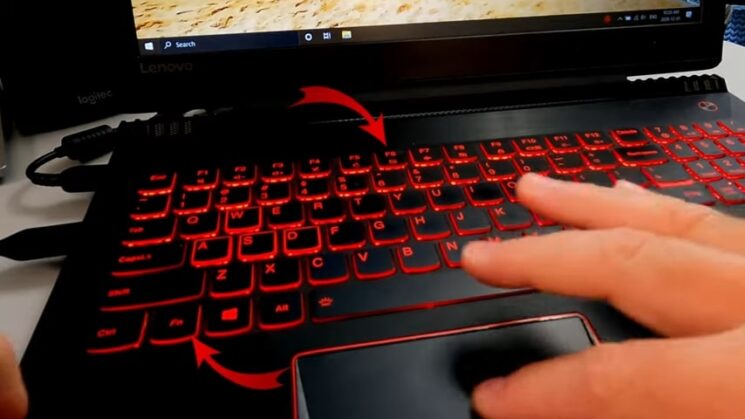
3. You can also enable it by shortcuts, which is much easier, but manually selecting it can be more reliable.
4. For the shortcut, press the Fn key and then either f6, f8, or f10 shortcut keys to enable it on a Lenovo Legion laptop.
Update the Touchpad Driver

It is quite simple to update the installed touchpad driver, which might stop working if it is not updated properly.
By following the steps below, you should be able to update it, and the mouse on your touchscreen should start working again.
Step 1
Go to the “start” window on the left side of your laptop homepage and right-click it.
Step 2
You should go to “Device Manager” and find the “Keyboard” option.
Step 3
Expand the “Keyboard” option, find the “Lenovo Keyboard Device” option, and right-click it.
This should have an explosion logo next to it, which means it needs to be updated.
Step 4
You will find the “Update Drive” option, and make sure to select “Browse my computer for drivers” and not the other one.
Step 5
Now you have to select the option “Let me pick from a list of available drivers on my computer.”
Step 6
Here you will finally find the “12C HID Device” and click “next,” which will finally update the driver in your laptop. After this, the “Lenovo Keyboard Device” should disappear from the “device Manager” tab.
Use the Windows Troubleshooter

This will help you detect any problem that there might be and fix the problem. To activate this, follow the following steps.
Step 1
Find and click on the “Windows” key and search and find the “Settings.”
Step 2
In the search bar, you will find the option for “Troubleshooting,” so click this option.
Step 3
From this, you have to go to “Hardware and Sound” and “Hardware and Devices” afterward.
Step 4
Click “Next” on the box that appears, and your Windows should resolve the problem that the touchscreen should have.
Step 5
Restart the device to make sure the problem has been solved.
Uninstall the Touchpad Driver
If you install the driver from a faulty source, it will not work properly. In this case, you will need to uninstall it, and it will be downloaded by itself once you restart it.
Also read: Lenovo Modern IM Controller
Step 1
Go to the “Windows” key and click on the “Start” menu from where you should go to “Settings.”
Step 2
Then launch “Windows Device Manager” and right-click on “Mice and other pointing devices.”
Step 3
Now you simply have to uninstall and restart your laptop.
Go to the Previous Touchpad Drive Software
Sometimes, the new updated drive just doesn’t work on your computer. In this case, you have to restore the original driver by rolling back the updated drive.
It is quite simple to do. This might only work if the external keyboard and mouse work but the touchpad will not.
Step 1
The first step is to download and install a driver booster software to check the updated driver and check it.
Step 2
From the software, search for “Keyboard,” from where you have to select “HID Keyboard Device.”
Step 3
Simply click on it, and you will find the “Roll Back” option to go back to the original version of the touchpad driver. Restart the laptop after that.
Roll Back the Operating System Update
If the OS is incorrectly installed or the installation is not completed, the touchscreen can stop working.
In this case, you have to roll back the installed OS and try again so it can properly update. It is pretty easy to do.
Step 1
Go to “Settings” and click on “Update and Security.”
Step 2
From here, you will find the “Update History” option, which you have to click and then again click the “Uninstall Update” to complete the process.
Step 3
There will be instructions on the screen that will help you roll back the update and then restart so you can update the OS again.
Increase Touch Sensitivity
Sometimes, the problem is not because of any problem but because the touch sensitivity is very low.
You just have to follow the following instructions to increase the touchpad sensitivity.
Step 1
Go to the search box and type “Touchpad,” and then click on “Touchpad Settings.”
Step 2
Touchpad sensitivity can be adjusted from the drop-down menu.
There is another way to fix the problem as well.
Step 1
GO to the “Control Panel” and find “Mouse.”
Step 2
Click on the “Mouse Properties” and increase the sensitivity from low to high.
Some More Questions You May Ask

Can I contact Lenovo/Claim a warranty if the touchscreen does not work?
Yes, you absolutely can. If all other option fails and you have a warranty, you should contact them.
If the laptop is under warranty, you can get one for free, or you will need to pay a little bit to get a new one.
How do I unfreeze my Lenovo touchpad?
There are many ways to fix this problem. Click keys F6, F8, or Fn+F6/F8/Delete, which is a shortcut to disable it.
How do I reset my Lenovo touchpad?
Go to settings and then select “Devices” after that, go to the “Touchpad” category on the left.
On the right, scroll down a bit and then click the “Reset” button under the “Reset Your Touchpad” section, and the laptop touchscreen will be reset.
What function key disables the touchpad?
The specific function key that disables the touchpad on a Lenovo laptop may vary depending on the model and the keyboard layout.
However, on many Lenovo laptops, the touchpad can be disabled by pressing the “F6” key, which is also known as the “Touchpad toggle” key.
On some Lenovo laptops, the touchpad may be disabled by pressing the “F8” key or a combination of the “Fn” key and the “F8” key.
You can look for the touchpad icon on the “F6” or “F8” key or refer to the user manual for your specific Lenovo laptop to find the correct function key to disable the touchpad.
Also read: HP Laptop Stuck On HP Screen
How do you Undisable a touchpad?
To enable a disabled touchpad on a laptop, you can try the following steps:
1. Press the function key that corresponds to the touchpad on your keyboard. On most laptops, this key is located near the bottom of the keyboard and is labeled with a touchpad icon or a function key number.
2. Check the touchpad settings in the control panel or settings app. Go to the “Mouse” or “Touchpad” settings and look for an option to enable or disable the touchpad.
If the touchpad is disabled, enable it and test it to see if it is working.
3. Restart your laptop. Sometimes, a simple restart can fix problems with the touchpad or other hardware devices.
4. Check for updates for the touchpad driver. Go to the laptop manufacturer’s website and download the latest touchpad driver for your laptop model.
Install the driver and restart your laptop to see if the touchpad is working.
5. If none of the above steps work, there may be a hardware issue with the touchpad. You may need to contact the laptop manufacturer’s customer support or take the laptop to a certified technician for repair.
By following these steps, hopefully, you’ll be able to fix your problem. If not, there may be other issues causing the touchpad to not work.