Is your PC running perfectly but the graphics card not displaying anything? A dark screen and that’s all that you are experiencing? Well, the most potential reasons behind GPU-related errors usually involve faulty Installation, Dust layers, Backdated Driver Software, or Power Supply Compatibility.
We’ll get you covered here in this article by providing all possible reasons for the GPU no-display issue and bringing you viable and handy solutions.
So, before calling an expert and spending money out of your pocket, why not try it yourself and troubleshoot the problem? Let’s head on.
Graphics Card Not Displaying Anything: Causes And Solutions
A malfunctioning graphics card could be caused by a number of factors. Test out the solutions provided below and try them out the way we’ve arranged them. We hope that either of these solutions would assist you in resolving this vexing problem.
1. Dust And Debris May Interrupt The GPU Performance
A layer of dust could be a major culprit to halt the graphics card from performing.
You should clean your GPU carefully to avoid any harm. Follow these below-mentioned steps to perform a proper cleaning:
➔ Turn off the PC and disconnect all the connections from the power socket.
➔ Open up the case of your Computer chassis
➔ Slowly remove the graphics card from the slot and make sure the video card is completely disassembled from other internal parts.
➔ Clean both sides of your graphics card with a disposable dust-off compressed duster. Blow air from an angle so that the dust won’t fall over the video card again.
➔ Assemble the video card gently again. Make sure all the connections are set up correctly.
If you still see the graphics card not displaying, we’d suggest you try other solutions that we set forth.
2. Reset The Graphics Card, Change Slot
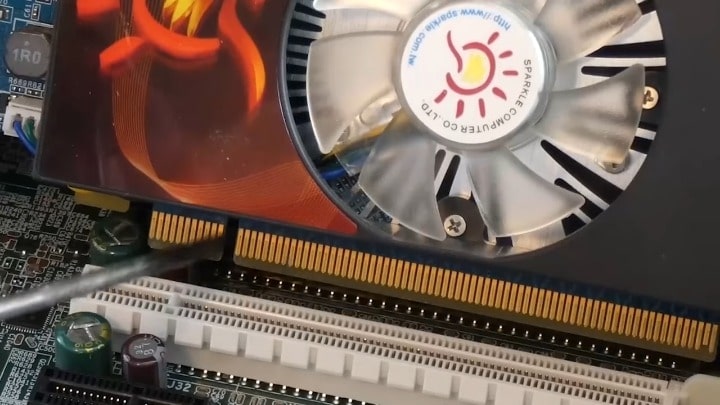
A faulty slot may be the culprit that causes your screen to go dark. So to check your graphics card slot or your GPU’s physical health, follow these below-mentioned steps as we have stated.
➔ Turn off your PC, unplug all connections.
➔ Remove the side panel screws of your PC and unscrew the GPU.
➔ Unplug the power cable carefully
➔ Completely remove the GPU from your system
➔ Inspect whether you see any physical damage on the slot or on the GPU.
➔ If you see any physical damage on the currently installed slot, then find another slot and insert the graphics card.
Not to mention, connecting your graphics card to a new PCI slot will require a driver installation.
If you are lucky enough this time, resetting your graphics card will make a difference. But if not…
3. Check Your Driver Software Update
As mentioned earlier, you’ll require a graphics driver installation right after resetting your GPU in a new slot. If the installed driver is not up-to-date, your computer may show you an undetected graphics card dialogue even if you have set up the GPU perfectly.
You can manually download updated driver software by searching on the internet and install them on your PC. Or you may follow these steps to check your driver’s current version and search for an updated driver automatically.
➔ Search for Device manager in the Control panel
➔ Select Display Adapters
➔ Click on the graphics device
➔ To update, select the driver tab and you’ll see the update driver button
➔ Click on the button and your system will automatically update the driver software.
If it shows that your driver is updated, this means you are not having any issues related to your driver software updates.
4. Power Supply Graphics Card Compatibility

An underpowered CPU may result in a collapse of your Graphics card processing Unit. In fact, this is one of the most common reasons the display go black.
A constant supply of poor level Wattages will cause malfunctioning in your system or even damage your PC’s crucial components.
In terms of the required Power Supply Unit or PSU capacity, a useful tip is that the amount of power used by your GPU should not exceed half of your PSU’s maximum power. Preferably, your graphics card should consume around 40% of your power supply’s capacity.
You can check your Current power supply’s compatibility by checking the PSU calculator. It’s a way to measure whether you are feeding your PC the right amount of power or not. Always make sure to get an upgraded version with a proper power connector. The bigger the connector is, the more power a GPU requires.
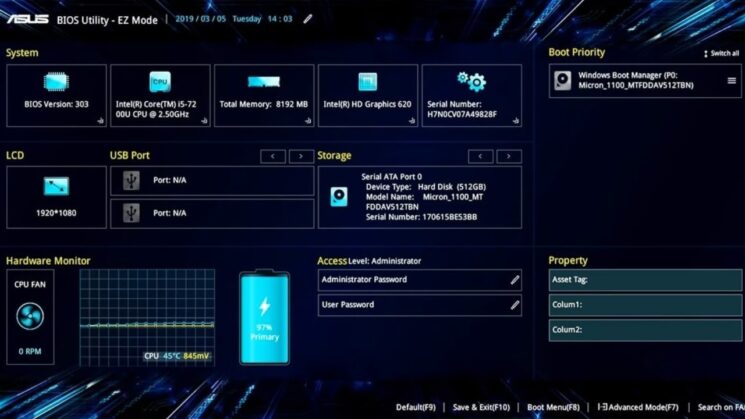
5. Graphics Card Bios Update
BIOS update issues may result in display-related problems. You need to ensure your BIOS is updated in order to retain the system function properly.
The procedure to update your GPU BIOS setting follows these below steps:
➔ Open the BIOS menu by pressing F2, F8, F10, and F12 or you can press the Esc or Del button (This may vary based on the manufacturer) when performing a reboot on your PC.
➔ Select the Advanced key by pressing the Left or Right Arrow button.
➔ Select the Video Configuration option by navigating the Up/Down arrow key.
➔ Find the PCI graphics option and press Enter.
➔ Press F10 to save the changes.
The alternative way to update your GPU BIOS is to use the Command prompt. To check the GPU BIOS update through the command prompt:
➔ Click the Start button
➔ Type cmd in the search box
➔ Click the Command Prompt that appears on the search result
➔ Type “wmic bios get smbiosbiosversion” and press enter
Following this process will show you the current version of your BIOS or UEFI Firmware. This will help you to make sure whether your PC BIOS needs an update or not.
6. Reset Graphics Card Bios
Those who already have updated BIOS may try restoring the default. This will remove any previous changes that have been providing interruption to your GPU settings for running seamlessly. For that, you need to
➔ Restart your PC
➔ Press the F10, F2, Del, or Esc (depending on your manufacturer) to bring the BIOS menu.
➔ Navigate through the BIOS menu and under the settings options, look for Restore to Default.
➔ Select the Restore to Default option and press enter.
7. Manually Reset The Motherboard’s BIOS
The Motherboard BIOS update could be a reason for the Graphics card no display problem. Follow these three simple options to manually reset the BIOS of the Motherboard of your PC.
Option 1:
- Turn off your PC
- Find the CMOS button on the backside of your Computer Chassis.
- If you find one, press the button and hold on for three seconds to reset your motherboard BIOS.
Option 2:
- Turn off your PC and remove the case.
- Look for a Clear CMOS Jumper that is usually located around your motherboard’s battery.
- Remove the Plastic Cap used on the pins.
- Turn on the PC to make sure the BIOS is cleared.
- Turn off the PC and set the plastic cap where it was.
Option 3:
- Turn off the PC and unplug all the connections.
- Carefully remove the battery from your motherboard.
- Wait for a few seconds and reset the battery.
8. Uninstall the latest Windows Update
If you are a Windows user, another possible reason behind a malfunctioned graphics card could be the latest Windows version that you’ve installed recently. The chances are slim but you can give it a try.
To uninstall the latest version of your Windows follow these simple steps:
➔ Click the Start Button on the left side or your computer screen
➔ Type Recovery into the Search Bar or go to the control panel and search for Recovery and click on the Recovery option that appears on the search result.
➔ Now click on the Open System Restore option
➔ A Dialogue box will appear and click on the Next button
➔ Now select the present version of the windows update that you have and click the Next button again.
➔ Now Click Finish and
➔ Restart Your Computer.
9. Try the GPU on another PC
This final silver lining may show the root reason of your GPU problem if none of the above-mentioned solutions have worked for you so far.
To verify whether your GPU component is defective, get an old GPU and test it on your motherboard, or test yours on a different PC.
If you discover that the replacement step resolves the problem. Regrettably, it is your graphics card that is causing trouble. If your graphic card is covered by a warranty or guarantee, replace it or repair it if the warranty period has expired.
An Error In The Gpu Is Not Merely The Cause Of A Black Screen
Not only the graphics card error but there could be some other reasons your PC screen goes black. If you have tried all the mentioned solutions regarding the GPU already, we’d suggest you check out the below potential causes and go for the solutions that we have covered here.
Overheated components
Well, you know why your PC’s internal parts have cooling fans. An overheated component will exhaust your system and halt it to perform. A black screen might be a result of an overheated machine.
Therefore, the manufacturers have set a Cooling fan on the motherboard.
However, a lack of ventilation to your PC’s internal components will cause overheating. To ensure ventilation, you need to clean the various parts of your PC on a regular basis.
Extreme weather is also responsible for the overheating issue. Your monitor is likely to stop displaying images due to overheating.
Harmful software
Malicious software can result in a blacked-out screen.
If you have recently installed any software that was downloaded from an unreliable source and right after installing, you are facing an issue like your monitor blacking out for a few seconds frequently, uninstall the software immediately.
Or if your device has external screen resolution software, or any other screensavers, or interactive wallpapers software downloaded from unauthorized sources, we’d suggest you uninstall them and restart your system.
Monitor issues
This may sound really unlikely, but a monitor on Sleeping or Standby mode won’t show any image.
If you were away from your PC, leaving it turned on for a few minutes, the monitor would go to sleep mode. To awaken it again, simply move the mouse, or click any of the mouse buttons, or press any key on your keyboard. If it doesn’t work, push the power button to return the monitor to its normal mode.
The same process you may follow in terms of bringing your monitor to normal mode from a Standby mode.
However, a dark monitor may be the cause of a lost connection or another Hardware issue.
Graphics Card Fan Spinning, No Display: How to Fix?
There are several steps you can try to fix a graphics card issue where the fan is spinning but there is no display:
- Check the cables: Ensure the cables connecting the monitor to the graphics card are securely connected and undamaged.
- Try a different monitor: Connect the graphics card to a different monitor to determine if the issue is with the monitor or the graphics card.
- Reinstall drivers: Uninstall the current graphics card drivers and then reinstall the latest version to ensure compatibility.
- Check for BIOS updates: Check for any available updates for the motherboard’s BIOS and install them if necessary.
- Power cycle the PC: Power off the PC, unplug it from the wall, and wait a few minutes before plugging it back in and restarting.
- Check the graphics card: Physically inspect the graphics card for any visible damage or loose connections, if the card appears damaged, it may need to be replaced.
If these steps do not resolve the issue, it’s possible the graphics card is faulty and may need to be replaced.
People Also Inquire About
How Do I Enable Display Cards?
To enable the graphics card, simply go to your Start Menu, type Device manager and click on it. Select the Display Adapter Option, this will show the Graphics Card that you have. Now right-click on the Graphics card option and click on the enable device if you see it’s disabled.
How Do I Fix My Display Card?
There can be several reasons behind a malfunctioned Display card. You can remove the dust from your display card, reestablish the cables and connections, update the driver software, reset or update the Graphics Card Bios, or Check the power supplies compatibility to resolve the issue.
How To Reset The Graphics Driver?
You can simply reset your graphics driver without closing other apps by pressing the Windows+Ctrl+Shift+B button at the same time. Right after pressing the shortcut key, you’ll experience a blackout screen for a few seconds. Resetting GPU is a potential solution to several graphics-related issues.
How Do You Check If A Graphics Card Is Working?
To check whether your graphics card is working, click on the start menu, type device manager and Click. Click the Graphics Adapter, select the graphics card and right-click on it. Enable Device option means your GPU is disabled and Disable Device means your GPU is running on your system.
What Is A Dp Port On A Graphics Card?
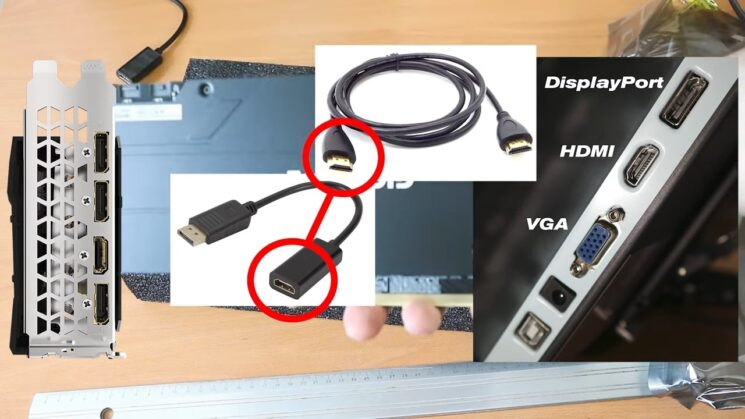
DP stands for DisplayPort which is a digital interface that helps your PC to deliver video and audio data to the monitor. You’ll find the Display port of your PC on the backside along with other Display connectors ports like HDMI, VGA, or DVI.
How can I prevent my graphics card from not displaying anything in the future?
To prevent your graphics card from not displaying anything in the future, you should:
- Keep the drivers up-to-date
- Ensure that the graphics card is properly cooled and that the fans are functioning properly
- Avoid physical damage to the graphics card
- Ensure that the power supply is providing enough power to the graphics card and that the cables are securely connected.
Final words
We hope that any of these solutions will fix your issue.
We have tried to bring you some handy and possible solutions that are brought to you based on experience.
If still, your graphics card is not displaying anything, we recommend you call an expert to resolve the issue.