Every computer consists of a cooling fan, which helps the processor’s tremendous heat to cool down and operate flawlessly. And often, removing the cooling fan is essential to either clean or check the cooler.
In this case, how to remove the CPU cooler? After turning off the computer, firstly, you have to uncover the cooler. Then, you have to make the thermal paste warm, and afterward, disconnect it from the motherboard. And then the last thing that you need to do is just unclip the cooler from the processor. That’s all!
Although for people who do this task regularly, it’s quite a simple job, it might be a tough one for beginners. Hold tight! Because we are going to share the elaborate CPU cooler removal process, the aftermath, and also, when exactly you should do it.
Without any further ado, let’s begin with the acknowledgment!
Precautions Before Attempting to Remove a CPU Cooler

A CPU cooler is a great way to improve the performance of your computer, but it can be surprisingly difficult to remove. Before you try to remove your CPU cooler, take these precautions:
1. Make sure that your computer is grounded. This is especially important if you are using an electrostatic discharge (ESD) protector. If there is an ESD event, the electricity in the air might cause the CPU cooler to fall off.
2. Disconnect all power cables from the CPU and motherboard before trying to remove the cooler.
3. Remove any screws that are holding the cooler in place. If you cannot remove it using just your hands, use a screwdriver or a socket wrench that fits the screws in the cooler.
4. Once you have removed the screws, carefully pull out the cooler and set it aside on a clean surface. Make sure that you do not touch any of the thermal paste or metal on the underside of the cooler or on the motherboard baseplate. Doing so could cause damage.
How to remove the CPU cooler?

The steps to remove a CPU cooler is quite simple. Below are the steps you need to follow to remove the cooler without damaging any other components.
Step 1: Turn off the computer:
Before you start any process, you must ensure that your computer is turned off. Otherwise, you will get shocks. Also, your computer may behave differently, and there will be possibilities for components burning.
Reminder: You can’t remove a cooler when the CPU is turned on. It also needs to be disconnected from the motherboard.
Step 2: Remove the cooler cover:
Some of the CPUs might have a duct or ventilation system. You need to remove it first to make the processor and heatsink visible. You can remove it quickly by pressing the clips and pulling the duct away.
Tips: make sure to do the work carefully because otherwise, you might end up hurting yourself. Also, if you make a hurry, then there are the possibility to break the cover.
Step 3: Heating the thermal paste:
A thermal paste is a material that attaches the cooler to the processor. If the thermal paste is cold, then it will keep the cooler fan and processor welded together. The trick to do this is to run your computer for 15-20 minutes.
It will heat the thermal paste, making it gooey and pliable, which eventually helps you to detach the cooler easily. For knowing more on how to remove the thermal paste, read here!
Tips: do not forget to do this step because it may leave bent pins that will ruin the cooler. Also, do not touch the warm thermal paste because you will end up burning yourself.
Step 4: Disengage the cooler:
You have to disengage the cooler from the motherboard before removing it. You can easily find a two, three, or four-pin cable connected to the motherboard. You have to remove the pins to disengage the cooler.
These pins are relatively easy to open if you know the process. Don’t pull with force if one pin is stuck. Moreover, don’t try to pull the pin by its wire because it might damage the connection from the pin. You can grab the connector end and pull it up to disconnect from the motherboard.
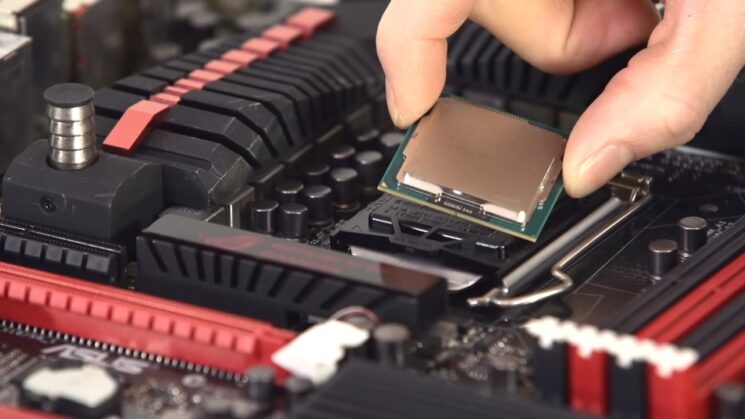
Step 5: Unclip from the processor:
There are several clips attached to the motherboard that keeps the cooler connected with the processor. After disengaging the cooler from the motherboard, locate the clips which are holding the cooler with the processor.
You can easily unclip them by gently pressing them down. Some coolers might be attached with screws. If your cooler is secured with screws, then unscrew them to remove the cooler. Do not force it because forces will break the cooler and damage the processor as well.
So this is how you should remove the CPU cooler from your computer. Now the process might be different for different models. If you own an Intel CPU cooler, we are going to talk about removing that now.
Removing the Intel CPU cooler:
Intel CPU coolers usually consist of four push pins that need to be pressed and turn anti-clockwise to remove it from the motherboard. Always remember to unplug the cooler connector from the motherboard at first.
You need to keep in mind that these intel four pins are a little bit different than others. That’s why the process that we have shared above might not be fully effective with Intel CPU coolers. In this case, you have to press the pins and twist it anti-clockwise to release it from the motherboard.
You can do it by hand, but there is space for inserting a screwdriver, which will make the removal easier. Once you successfully pull off all four pins, you should be able to hold the side of the cooler and lift the fan up with almost no effort at all.
If your cooler doesn’t come out easily, then one or two of the pins might still be attached to the motherboard. Recheck it, and don’t try to pull up by force. Forcefully removing the cooler will damage both your motherboard and cooler.
You will find that the processor and cooling unit is attached with a thermal paste. You need to clean it up and give the new paste again before reattaching it back.
How to remove the cooler master CPU fan?
Here we found another variation among the CPU coolers. So, we had to let you know the process for this one as well. The cooler master CPU units are quite big and heavy from other cooling units. You will find it attached with four screws above your processor.
The cooler master CPU fan is attached to a thermal cooling unit with three clips. You can unclip the clips using a screwdriver, and then the fan can easily come out, leaving the massive heat sink behind. Pretty simple, right?
But, if You want to remove the whole unit, not just the fan, you need to unscrew the four screws with a screwdriver. This is quite tough and tricky work, so you need to do it with much care.
This full heat sink unit is also attached to the processor with thermal paste. So you have to warm the thermal paste before you start your removal process, as we stated above.
What happens if the CPU cooler is removed?

The CPU cooler remains sealed with thermal paste with the processor. When you remove it, the seal will be broken, and you can not put it back with the remaining paste. This will create bubbles in the paste, and the cooler will not get attached to the processor properly.
As you can’t run a computer without a CPU cooler, you have to reattach a new CPU cooler or the existing cooler after cleaning up. In this case, if the bubble remains in the paste, then your cooler will not be capable of cooling down your processor properly, causing your PC to perform slowly.
So, when you remove a cooler from your CPU, make sure to clean the remaining old paste and then give some new thermal paste to seal the new or existing cooler correctly because you won’t be able to run your computer without the cooler as it’s essential for cooling down the components.
When should I remove the CPU cooler?
With time of regular usage, the cooler fan stores a lot of dust, which causes the heat sink unit to not perform up to the mark. You have to take it out, clean the dust, and place it back properly. So removing and cleaning up will help the processor to work efficiently without heating up more often.
Also, if you think that your old cooler is not working properly, of course, you have to get a new one then. You can notice overheating CPU, and constant restarting of your computer if your cooler goes bad.
Again, oftentimes, the old thermal paste becomes greasy and dirty. In those cases, we need to use a new paste to attach the existing cooler properly. To reapply the thermal paste, you have to remove the CPU cooler.
FAQs
1. How to Remove a CPU Cooler That Is Hard Stuck to the Heat Sink?
If you have a screwdriver that is the correct size, you can use it to pry the cooler off of the heat sink. You may also need to use a flathead screwdriver to help loosen the screws that are holding it in place. Once the screws are loose, you can remove the cooler.
If using a screwdriver isn’t working, you can try using a heat gun or hair dryer. Be sure not to overheat either tool though, as this could damage your CPU cooler.
2. How to Remove a Liquid CPU Cooler?
There are a few things that you need to know in order to complete the task:
1) Remove the screws or clips that secure the cooler to the motherboard. Be sure to note where they went before removing the cooler.
2) Lift up the cooler and set it aside on some newspaper or other soft material.
3) If your liquid CPU cooler has any fans attached, detach them now. Fan blades can be sharp and can damage hardware if not handled carefully.
4) If your liquid CPU cooler has fins or tubes attached, carefully twist each one off of its connector. Be careful not to tear the tubing; if it does, simply replace it with a new one from the manufacturer.
3. How to Reapply Thermal Paste After the Cooler Is Removed?
If you have removed your CPU cooler, it is important to reapply thermal paste as soon as possible. Follow these five simple steps to ensure a successful application:
- Clean the surface where the cooler will be applied.
- Measure and pour thermal paste onto the clean surface.
- Apply pressure to the paste with your fingertips, then spread it evenly across the surface.
- Let the paste cool for at least two hours before applying a heat source (like a hair dryer).
- Test fit the cooler and make sure it is secure before painting or covering it in any way.
4. Can you take off CPU cooler without thermal paste?
Thermal paste is a key component of CPU cooling, and removing it can result in increased thermal temperatures.
However, it is possible to remove CPU cooler without thermal paste if the cooler is made from a thermal material that allows for easy removal. Some coolers are designed to be removed without thermal paste by using screws or other mechanisms.
Final words
In the end, we can say that a CPU cooler is a very essential and powerful unit of a CPU. This helps to reduce the excessive amount of heat that a powerful processor can produce.
Though the work is tricky and removing and reattaching the cooler unit is quite a challenging task, you can easily do that if you follow our given steps and guidelines on how to remove the CPU cooler.
Also, as thermal paste plays a vital role in keeping the pc attached to the processor, learn how to remove the old thermal paste and apply the new one and attach the cooler back again properly.
The cooler unit itself is a susceptible item, the same as the processor. So while you are doing this on your own, make sure to do it with care. Good luck!